Paint panel
Creating a paint project
To start painting in Material Maker, just use the File -> New paint project menu. This will show a dialog where a model file and a texture size can be specified.
The model must be provided in either Wavefront .obj, .glb, .gltf or .fbx format and
have a single submesh. Of course, the model must have textures coordinates information.
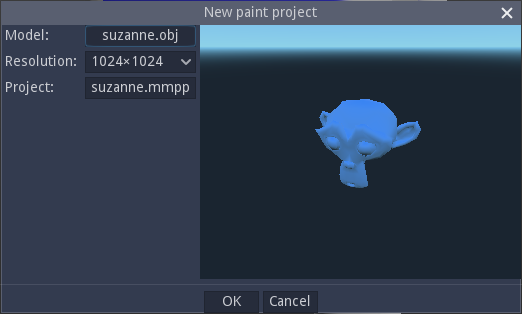
A project file name will be automatically selected, but it is possible to modify it before creating the paint project.
Clicking on the OK button of the dialog will create the new project and show the Paint panel, which consists of two sub panels. The top subpanel shows the model to be painted, and the bottom subpanel shows the graph where the current brush is described.
Painting a 3D model
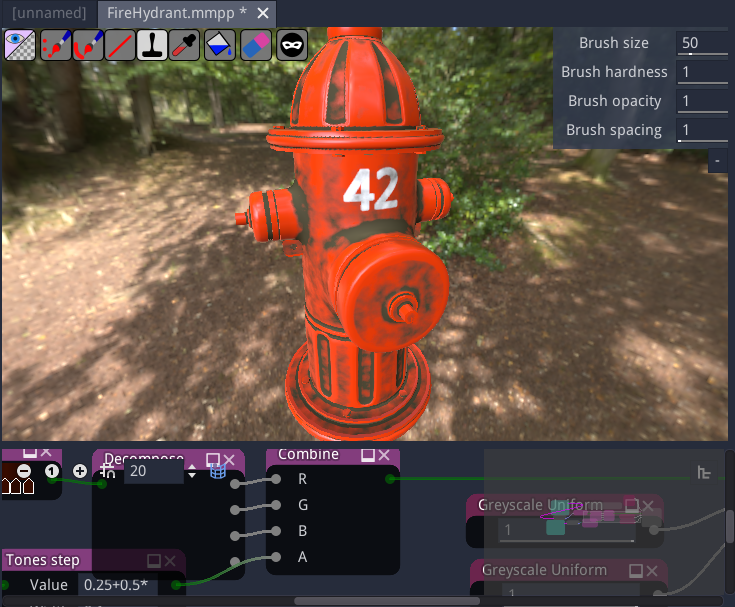
The paint subpanel is where the model is actually painted. It shows the model with its material in its current state, and a dynamic preview of the current brush.
Note that for procedural layers, the layer brush is applied to the whole model, and consequently painting tools are not available.
In the paint subpanel, the model can be rotated by holding the middle mouse button and translated by holding the middle mouse button and the Shift key.
The mouse wheel can be used to modify the zoom level. If the Control key is held, the mouse wheel will adjust the camera’s field of view angle.
The left mouse button (with no modifier) can be used to paint on the currently selected layer. Holding the Shift key and the left mouse button will modify the brush size (by moving left and right) and hardness (by moving up and down). Holding the Control key and the left mouse button will modify the pattern size and orientation (more about brushes and brush types below). Holding the Control key will also show the patten on the whole view (which can be useful with Pattern and UV pattern brushes).
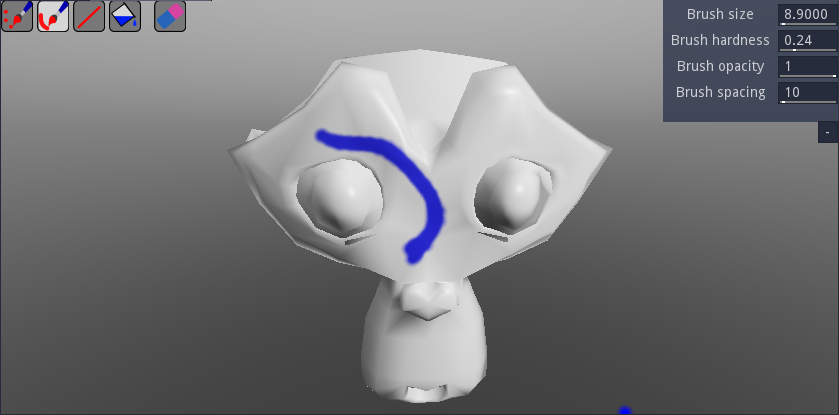
In the top left corner of the paint subpanel, buttons can be used to select a painting tool. The available tools are:
The painting engine selector
 , that can be used to switch to one of the
following painting engines:
, that can be used to switch to one of the
following painting engines:The View space painting engine, that projects the brush into the current view. This engine paints correctly across seams, but since it is aligned to the view, the result will be stretched where the painted surface is not perpendicular to the view.
The texture space painting engine, that paints directly in texture space. This engine is view independent and does not distort of stretch the result, but cannot paint across seams. Also make sure you see the whole brush before painting, to avoid painting on UV islands that are not currently visible.
A freehand painting tool
 , that directly applies the brush to the painted surface
A freehand line tool
 , that paints a line following the mouse cursors movement
A line tool
 , that draws straight lines
A stamp tool
 that allows to place the center of the stamp by pressing the mouse button,
then adjust its orientation and size before releasing the button
that allows to place the center of the stamp by pressing the mouse button,
then adjust its orientation and size before releasing the buttonA color picker tool
 , that can be used to pick colors from the painted model and
modify the current brush if it is compatible (for example the Uniform brush)
, that can be used to pick colors from the painted model and
modify the current brush if it is compatible (for example the Uniform brush)A fill tool
 ; pressing this button will directly fill the current layer using
the current brush, or erase it if the eraser mode is active. Only channels that arte active
in the brush are affected
; pressing this button will directly fill the current layer using
the current brush, or erase it if the eraser mode is active. Only channels that arte active
in the brush are affectedAn eraser mode
 , that applies to all painting tools
A mask selector
 that will show a dialog that can configure the
painting mask using an ID map
that will show a dialog that can configure the
painting mask using an ID map
In the top right corner, common brush parameters such as size, hardness, opacity and spacing can be modified.
Note that before painting, it is necessary to select a brush (by double-clicking it in the Brushes panel) and a layer.
Creating and modifying brushes
The bottom subpanel is a graph that can be used to create brushes. This is very similar to creating materials, except the target node is the Brush node (instead of Material).
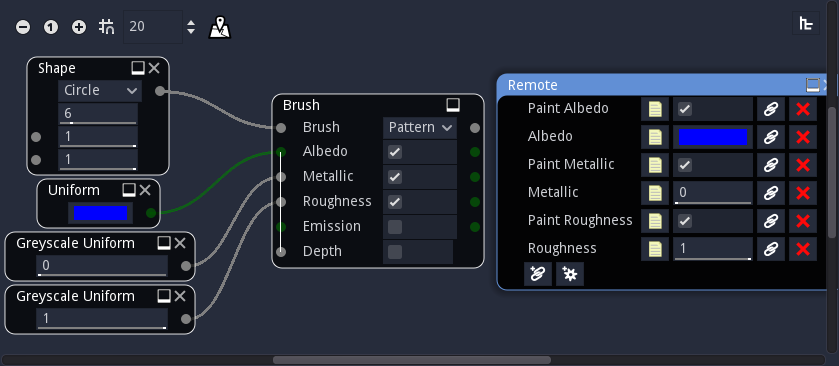
The Brush node has 6 inputs:
the brush input is a grayscale image that defines the shape of the brush. White pixels are painted, black pixels are not and grey values are used as alpha. The Brush input is implicitely modified using the Brush hardness and the Brush opacity parameters.
the other channels are color (Albedo and Emission) and grayscale (Metallic, Roughness and Depth) images that define the patterns painted on each component of the model’s material. Albedo has its own alpha channel that is combined with the Brush value and used as transparency for all components.
The Brush node’s parameters are the following:
the Brush type defines how the pattern is applied on the model
when Stamp is selected, the patterns are mapped on the brush itself. This mode is well suited to paint shapes on the model
when Pattern is selected, the pattern repeats on the painting view space. It is useful to paint 2D patterns directly on the object, but may be difficult to use when painting from different angles.
when UV Pattern is selected, the pattern repeats in texture space. It is generally not used directly with 2D patterns, but using the 3D Brush Map and Triplanar Brush Map nodes, it can be use to easily fill large portions of the model with a single material. It is also the most flexible mode as it can be used to apply 3D textures or effects that depend on the mesh geometry.
The other parameters (Albedo, Metallic, Roughness, Emission and Depth) are booleans that define if the corresponding component of the material will be painted.
Brushes can have a Remote node whose parameters will be shown in the Parameters panel.
Custom brushes can be saved into the user brush library using the Tools->Add current brush to the user library menu entry.
Selecting a painting mask
The mask selector button will show the mask selection dialog, that can be
used to set the current painting mask. This mask will affect all painting operations.
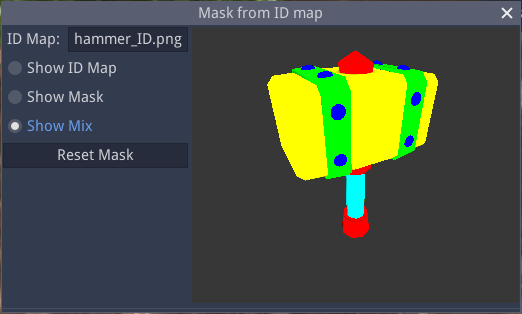
To modify the painting mask, it is first necessary to load an ID map for the model.
When an ID map has been selected, clicking on the model will assign the corresponding ID to the mask.
The 3D view of this dialog can be configured to show the ID map, the mask, or a mix of both.
It is also possible to reset the mask so the whole object can be painted.